
Garage Door Spring Repair: What Every California Homeowner Needs to Know Before Touching That Spring
Broken springs are the #1 cause of garage door failure. Here’s how to identify the problem, understand your options, and stay safe throughout the process.
Need Spring Repair?
24/7 emergency service across Northern California 📞 (888) 987-0933
Request Emergency Service
Garage door springs are the hardest-working components in your garage door system, operating under extreme tension every single day.
You hit the remote. The motor hums. The door doesn’t budge. Or maybe you heard a loud bang from the garage at 6 AM, like a gunshot echoing off the walls. Either way, you’re probably dealing with a broken garage door spring.
It’s the single most common garage door failure, and it’s the one repair that carries the most risk for homeowners who try to handle it themselves. Every year, thousands of people are injured attempting DIY spring repairs because they underestimate the raw force stored inside these coiled metal components.
This guide covers everything you need to know about garage door spring replacement and repair: how springs work, the warning signs of failure, what a professional repair involves, the real cost breakdown, and the one thing you should absolutely never do yourself. If you’re a California homeowner dealing with a broken or failing spring right now, you’ll find clear, actionable answers here.
What Garage Door Springs Actually Do
Your garage door is heavy. A standard single-car steel door weighs between 130 and 200 pounds. Double-car doors can exceed 350 pounds. Wood garage doors are even heavier, sometimes reaching 400 pounds or more depending on the species and panel thickness.
Springs counterbalance that weight. When properly calibrated, they store enough tension to offset nearly the entire weight of the door, which means your garage door opener only needs to supply a small amount of force to raise and lower the door. Without springs, the opener motor would burn out within weeks trying to muscle all that weight on its own.
Here’s how the counterbalance system works:
- When the door closes: the springs wind tighter (torsion) or stretch longer (extension), storing mechanical energy.
- When the door opens: that stored energy releases, lifting the door’s weight so the motor barely has to work.
- At the halfway point: a properly balanced door stays put on its own. If you disconnect the opener and the door falls or rises, the springs are out of adjustment or nearing failure.
This is why a broken spring doesn’t just mean inconvenience. It means the full weight of your door is now unsupported. The opener can’t compensate. The cables may go slack. And the door could drop without warning.
Torsion Springs vs. Extension Springs: What’s on Your Garage Door?
Not all garage door springs are the same. The two main types work differently, fail differently, and require different repair approaches. Knowing which type you have helps you understand what’s happening and communicate clearly with your technician.
Torsion Springs
Torsion springs mount horizontally on a metal shaft (the torsion bar) directly above the garage door opening. They work by twisting. When the door closes, the spring winds tighter and stores rotational energy. When the door opens, the spring unwinds and transfers that energy through the shaft, cable drums, and lift cables to raise the door.
Where you’ll find them: Most modern residential and commercial garage doors use torsion springs. They’re more controlled, quieter, and longer-lasting than extension springs.
Key facts about torsion springs:
- Rated by cycle life: standard (10,000 cycles), high-cycle (25,000–100,000 cycles)
- Heavier doors may use two springs for balanced lifting
- Spring size is determined by wire gauge, inside diameter, and overall length
- They store extreme rotational force and should only be handled with professional winding bars
Extension Springs
Extension springs run along the horizontal tracks on both sides of the door, above the upper track section. They work by stretching. When the door closes, they extend and store energy. When the door opens, they contract and pull the door up via a pulley and cable system.
Where you’ll find them: Older residential installations, lighter doors, and garages with limited headroom. They’re less common on newer builds but still widely present across California homes built before the 2000s.
Key facts about extension springs:
- Always come in matched pairs (one per side)
- Should include safety cables threaded through the center to contain the spring if it breaks
- More prone to uneven wear, which can pull the door off-track
- Generally less expensive to replace but have shorter lifespans
💡 Quick Identification: Stand inside your garage and look up. If you see a thick coiled spring running horizontally above the door on a metal bar, that’s a torsion spring. If you see springs stretching along the sides of the horizontal track, those are extension springs.
Signs Your Garage Door Spring Has Failed or Is About to Fail
Spring failure doesn’t always announce itself with a dramatic snap. Sometimes it’s gradual: the door gets heavier, the opener strains harder, small noises creep in over weeks. Other times, it’s sudden and unmistakable. Here are the warning signs, ranked by urgency.
Immediate Failure Signs (Stop Using the Door)
- Loud bang from the garage: A torsion spring snapping sounds like a firecracker or a heavy metal object falling. If you heard this, the spring has broken and released its stored energy. The door is now dead weight.
- Visible gap in the spring: Look at the torsion bar above the door. A broken spring will have a visible gap of 2 to 6 inches where the coils separated.
- Door won’t open, but the motor runs: The opener motor hums or strains, but the door barely lifts off the ground. This means the spring is no longer counterbalancing the weight.
- Door slammed shut or dropped suddenly: Without spring support, the door can crash down. This is a serious safety hazard, especially if you have children or pets near the garage.
- Cables hanging loose or dangling: When a torsion spring breaks, the cables connected to the cable drums often go slack. Loose cables can snag, tangle, or whip.
Early Warning Signs (Schedule Service Soon)
- Door feels heavier when lifting manually: Disconnect the opener and try lifting the door by hand. If it takes significant effort, the springs are losing tension.
- Door doesn’t stay at the halfway point: A balanced door should hover at the midpoint. If it sinks or shoots up, the spring tension is off.
- Jerky or uneven movement: The door stutters, shakes, or tilts to one side during operation. This often points to uneven spring wear or a failing spring on one side.
- Opener motor struggles or reverses: Modern openers have force sensors. When springs weaken, the motor works harder and may trigger the auto-reverse safety feature.
- Squeaking, grinding, or popping: Dry springs, corroded coils, or fatigued metal produce new sounds as they approach their cycle limit.
- Visible rust, corrosion, or stretched coils: Coastal California homes are especially vulnerable. Salt air accelerates corrosion on unprotected springs, reducing their lifespan by 30% or more.
If you’re noticing early warning signs, a professional garage door maintenance visit can catch problems before they become emergencies. Most spring adjustments and lubrication take under an hour.
Why DIY Garage Door Spring Repair Is Dangerous
There’s no gentle way to say this: garage door spring repair is one of the most dangerous home maintenance tasks in existence. It’s not in the same category as changing a faucet or replacing a light switch. It’s closer to working with high-voltage electrical panels or pressurized gas lines.
Here’s why:
The Force Involved Is Extreme
A standard torsion spring for a 200-pound door stores roughly 200 foot-pounds of torque when fully wound. That’s enough force to break bones, fracture skulls, or send a winding bar through drywall. The spring doesn’t release energy gradually. If it slips, it releases everything at once.
Specialized Tools Are Non-Negotiable
You need professional-grade winding bars that are the correct diameter for your winding cone. Screwdrivers, rebar, and pipe segments are not substitutes. They can slip out of the cone holes under tension, turning into projectiles. Proper winding bars are solid steel, 18 inches long, and precisely sized.
Measurement Errors Are Costly
Getting the spring specifications wrong, even by a small margin, means the door won’t balance correctly. An over-wound spring can snap during installation. An under-wound spring means the door is too heavy for the opener and creates a safety hazard. Spring specs involve wire gauge, inside diameter, overall length, and winding direction (left-wound vs. right-wound), and mixing these up is more common than you’d think.
The Consequences Are Serious
Emergency rooms across California see garage door spring injuries regularly. The Consumer Product Safety Commission reports approximately 30,000 garage door-related injuries annually in the United States, and spring and cable incidents account for a significant portion of the most severe cases.
⚠️ Go Pro Garage Doors’ Official Recommendation: When it comes to garage door springs, always leave the work to a trained technician. Our team at Go Pro Garage Doors handles spring repairs daily with the right tools, training, and safety protocols. There is no DIY shortcut that’s worth the risk. Call us at (888) 987-0933 and we’ll take care of it.
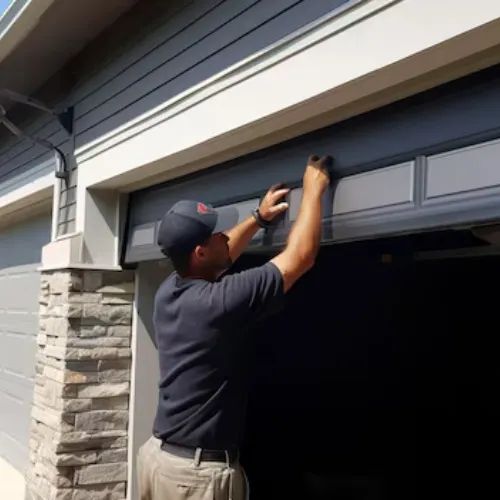
What a Professional Garage Door Spring Repair Looks Like
Understanding the professional repair process helps you know what to expect when a technician arrives, how long the job takes, and why it costs what it does. Here’s the step-by-step process our technicians follow for a garage door repair involving springs.
Step 1: Safety Lockout and Assessment
The technician disconnects the garage door opener from its power source and secures the door in place using C-clamps or locking pliers on the track. This prevents any accidental movement. They then inspect the entire spring assembly, cables, drums, tracks, and brackets to identify all affected components.
Step 2: Controlled Tension Release
Using professional winding bars inserted into the winding cone, the technician releases the remaining tension from the broken spring in controlled quarter-turn increments. This is the highest-risk phase of the job, which is exactly why it requires training and the correct equipment.
Step 3: Removal of the Old Spring
Once all tension is released, the technician removes the set screws, detaches the stationary cone from the center bracket, and slides the old spring off the torsion bar. If cables or cable drums are worn, they’re removed at this stage too.
Step 4: Measurement and Matching
Even if you tell the technician your spring specs, a good tech will re-measure. They check wire diameter (by counting 10 coils and measuring the length), inside diameter, overall spring length, and winding direction. Getting these right ensures correct counterbalance for your specific door weight.
Step 5: Installation of New Springs
The new spring (or springs; we strongly recommend replacing both at the same time) slides onto the torsion bar. The stationary cones attach to the center bracket. Cable drums are reinstalled, lift cables are threaded and tensioned evenly, and the center bearing is set.
Step 6: Winding and Calibration
The technician winds each new spring to the manufacturer’s specification, typically 30 quarter-turns for a 7-foot door or 36 for an 8-foot door. They then stretch the spring slightly (about 1/4 inch) to prevent coil binding and tighten the set screws against the torsion bar.
Step 7: Testing and Final Adjustment
Clamps are removed, and the door is tested manually. A properly balanced door lifts easily and stays in place at the halfway point. The technician reconnects the opener, tests the auto-reverse safety feature, checks sensor alignment, and lubricates all moving parts. The full repair process typically takes 45 to 90 minutes.
Garage Door Spring Repair vs. Full Replacement: How to Decide
Not every spring issue means you need brand-new hardware. But not every fix is a simple adjustment, either. Here’s how to think about the repair-versus-replacement decision.
When Repair (Adjustment) Makes Sense
- The spring is intact but has lost tension over time
- Springs are less than 3 to 4 years old with no visible damage
- The door is slightly unbalanced but cables and hardware are in good condition
- You’re dealing with a minor lubrication or noise issue
When Replacement Is the Better Call
- The spring has snapped or has a visible gap in the coils
- Springs are older than 7 years or approaching their cycle rating
- Visible rust, corrosion, or metal fatigue (common in coastal CA)
- One spring broke and the other is the same age (replace both for balanced wear)
- You’re upgrading the door to a heavier material like steel or wood
- You want to upgrade to high-cycle springs for longer life
💡 Pro Tip: If one spring breaks and the pair is the same age, replace both. The second spring is statistically close to failure. Replacing one at a time means paying for two service calls instead of one, and you risk a second unexpected failure within months.
How Much Does Garage Door Spring Repair Cost in California?
Cost is usually the first question homeowners ask after “is it safe?” Here’s a realistic breakdown based on current California pricing. Keep in mind that these are general ranges, not fixed quotes. Your actual cost depends on door size, spring type, accessibility, and whether you need emergency or after-hours service.
| Service | Typical California Cost Range | Notes |
|---|---|---|
| Single torsion spring replacement | $180 – $400 | Parts + labor; standard cycle rating |
| Pair of torsion springs (recommended) | $250 – $550 | Best value; balanced wear on both sides |
| Extension spring pair | $150 – $350 | Includes safety cables if missing |
| High-cycle torsion spring upgrade | $300 – $650 | 25,000+ cycle rating; lasts 15–20 years |
| Spring adjustment/rebalance | $90 – $180 | No new parts; tension reset and lube |
| Emergency/after-hours spring repair | $250 – $600 | Evenings, weekends, and holidays |
| Cable replacement (with spring repair) | $75 – $200 additional | Often bundled; frayed cables are a safety risk |
At Go Pro Garage Doors, we provide free estimates and transparent pricing before any work begins. Our technicians arrive with a fully stocked truck, which means most spring repairs are completed in a single visit with no follow-up trip needed.
Choosing the Right Replacement Spring for Your Garage Door
Not all springs are interchangeable. The right spring depends on your door’s weight, height, track configuration, and how often you use the garage. Here’s what matters when selecting a replacement.
Wire Gauge
Thicker wire handles more weight. Your technician measures this precisely. Getting it wrong by even one gauge size can make the door dangerously unbalanced.
Inside Diameter
This must match your torsion bar. Standard residential sizes are 1.75 inches or 2 inches. Commercial doors use larger diameters.
Spring Length
Determined by door weight and height. Longer springs distribute stress across more coils, which extends lifespan. If your headroom allows it, a slightly longer spring can be a smart upgrade.
Cycle Rating
This is the most important longevity factor. A 10,000-cycle spring lasts roughly 7 to 10 years for average use (3 to 4 open/close cycles per day). If you have an EV that charges in the garage, a home office above the garage, or kids going in and out frequently, you’re looking at 6 to 10 cycles daily. In that case, a 25,000 or 50,000-cycle spring is a much better investment.
Material and Coating
Standard oil-tempered springs work well for inland California homes. For coastal properties near San Francisco, Monterey, or anywhere with salt air exposure, galvanized or powder-coated springs resist corrosion significantly better and are worth the modest upfront premium.
When you schedule a spring repair service with Go Pro, our technician will recommend the right spring type based on your specific door, usage patterns, and local climate conditions.
Garage Door Spring Maintenance Tips That Actually Extend Spring Life
Springs don’t last forever, but they can last a lot longer with basic care. These garage door maintenance steps are safe for homeowners and can add years to your spring’s service life.
Lubricate Springs Every 6 Months
Apply a silicone-based or lithium-based garage door lubricant directly to the spring coils. This reduces friction between coils during winding and unwinding, prevents surface rust, and keeps operation quiet. Don’t use WD-40. It’s a solvent and cleaner, not a long-term lubricant.
Perform a Balance Test Twice Per Year
Disconnect the opener by pulling the red emergency release cord. Manually lift the door to the halfway point and let go. If it stays put, the springs are balanced. If it drops or rises, the tension is off and needs professional adjustment.
Visually Inspect Springs Monthly
Look for rust, gaps between coils, elongated or stretched sections, and any signs of wear at the mounting points. Catching corrosion early, especially in humid or coastal areas, can prompt a timely replacement before a sudden break.
Keep the Tracks and Hardware Tight
Loose track brackets, wobbly hinges, and worn rollers all increase the stress on springs. When the door doesn’t travel smoothly, the springs have to work harder every cycle. Address hardware issues promptly to protect your springs.
Schedule Annual Professional Inspections
A trained technician can measure spring tension accurately, check cable condition, and spot fatigue indicators that aren’t visible to an untrained eye. Our garage door maintenance programs include comprehensive annual inspections that cover springs, cables, tracks, rollers, sensors, and opener function.
💡 California Climate Note: If you live in the Central Valley where temperatures regularly exceed 100°F, heat accelerates metal fatigue in springs. If you’re coastal, salt air pits and corrodes spring steel. Either way, semi-annual inspections are more important here than in milder climates.
Emergency Situations: What to Do Right Now If Your Spring Breaks
A spring just broke. The door is stuck, your car is trapped inside (or outside), and you need to know what to do in the next 10 minutes. Here’s your immediate action plan:
- Don’t try to open the door with the opener. The motor will strain against the full, unbalanced weight of the door. Running the opener with a broken spring can burn out the motor, strip gears, or damage the opener motor beyond repair.
- Don’t try to lift the door manually. Without spring counterbalance, the door is at full weight. A standard double-car door at 300+ pounds can easily cause back injuries, crushed fingers, or worse if it slips.
- Keep everyone away from the door. Children, pets, and anyone unfamiliar with the situation should stay clear. A door with a broken spring and slack cables is unpredictable.
- Secure the door if it’s partially open. If the door is stuck partway up, place C-clamps on the track just below the bottom rollers to prevent it from dropping further.
- Call for emergency garage door repair. Go Pro Garage Doors offers 24/7 emergency service across Northern California. We stock the most common spring sizes on our trucks and can complete most emergency spring replacements in a single visit.
If your car is trapped inside and you need to leave urgently, call us first. Our dispatch team can often get a technician to you within 60 to 90 minutes for emergency situations. Attempting to force the door open yourself risks far more damage and danger than waiting for a professional.
Frequently Asked Questions About Garage Door Spring Repair
Why is my garage door not opening even though the motor runs?
When the motor runs but the door doesn’t move, a broken torsion or extension spring is the most likely cause. The spring counterbalances the door’s weight, so without it, the opener motor can’t generate enough force to lift the door. You may also hear a loud bang when the spring snaps. Stop using the opener immediately and call a professional technician to avoid motor burnout or cable damage.
How much does garage door spring repair cost?
In California, garage door spring repair typically costs between $180 and $400 for a single torsion spring replacement, including parts and labor. Replacing both springs (recommended for balanced wear) usually runs $250 to $550. Extension spring repairs tend to cost slightly less at $150 to $350. Factors like spring gauge, cycle rating, door weight, and emergency timing affect the final price. Contact Go Pro Garage Doors for a free estimate.
How often should garage door springs be serviced or replaced?
Standard garage door springs are rated for about 10,000 cycles, which translates to roughly 7 to 10 years for an average household opening the door 2 to 4 times per day. High-cycle springs rated at 20,000 to 30,000 cycles can last 15 to 20 years. Annual professional inspections and lubrication every 6 months help maximize spring lifespan and catch early signs of fatigue before a sudden break occurs.
Can I repair a garage door spring myself?
Garage door spring repair is one of the most dangerous home repair tasks and is strongly discouraged as a DIY project. Torsion springs store extreme tension capable of causing severe injuries, broken bones, or worse. Even extension springs under load can whip violently if released improperly. Professional technicians have specialized winding bars, training, and experience to perform this work safely. Always call a licensed garage door spring technician for any spring-related service.
Broken Garage Door Spring? Don’t Wait. Don’t DIY. Call Go Pro.
With 40+ years of experience and 24/7 emergency service across Northern California, Go Pro Garage Doors is the team you call when springs fail. We arrive with fully stocked trucks, provide upfront pricing with no hidden fees, and complete most spring repairs in under 90 minutes.
Whether you need emergency spring repair right now, want to schedule a maintenance inspection, or you’re considering a full garage door installation, we’re here to help.
📞 Call (888) 987-0933
Request Emergency Service
Schedule a Repair
Free estimates · Same-day service available · Serving all of Northern California