
Garage Door Installation Tips: A Complete Step-by-Step Guide for Homeowners
Everything you need to know before installing a new garage door, from choosing the right materials and tools to understanding safety risks and knowing when to call a professional.
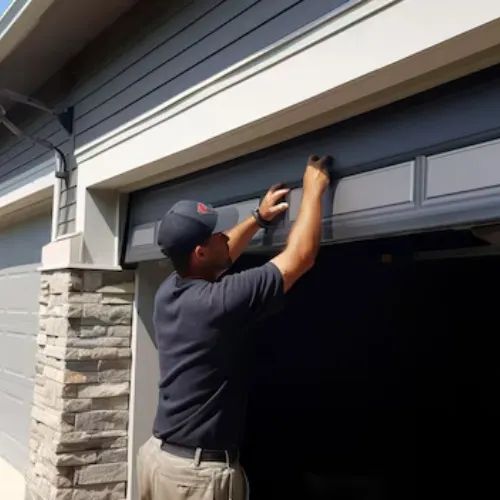
A properly installed garage door improves curb appeal, security, and energy efficiency.
Installing a new garage door is one of the most impactful home improvement projects you can take on. According to Remodeling Magazine’s annual Cost vs. Value report, garage door installation consistently ranks among the top home upgrades for return on investment, often recouping over 90% of the project cost at resale.
But here’s the reality most homeowners don’t expect: a garage door is the largest moving object in your home. It weighs anywhere from 130 to 400+ pounds, operates under extreme spring tension, and cycles thousands of times per year. Getting the installation right isn’t just about aesthetics. It’s about keeping your family safe and your home secure.
Whether you’re replacing a worn-out door, upgrading your home’s exterior, or building a new garage, this guide covers every step of the process. You’ll learn how to plan your project, choose the right materials, avoid costly mistakes, and understand exactly when a professional installer should step in.
Why Proper Garage Door Installation Matters
A garage door that’s installed correctly operates smoothly, quietly, and safely for 15 to 30 years. A door that’s installed poorly? It creates problems from day one, and those problems compound fast.
Here’s what’s at stake:
- Safety risks: Improperly tensioned springs can snap with lethal force. Misaligned tracks cause doors to jump off and drop unexpectedly. About 30,000 people visit emergency rooms each year due to garage door injuries.
- Warranty protection: Most manufacturers require professional installation to honor their warranty. A DIY job that fails an inspection could leave you paying for both the repair and the replacement.
- Energy efficiency: Gaps from poor installation allow heat transfer, drafts, and moisture intrusion. In Northern California’s varied climates, this directly impacts your energy bills.
- Home security: A door that doesn’t sit flush or lock properly becomes an easy entry point. Criminals know how to exploit installation flaws.
- Property value: Crooked panels, visible gaps, and noisy operation reduce curb appeal and buyer confidence. A clean, professional install does the opposite.
The takeaway: cutting corners on installation creates problems that cost far more than doing the job right the first time.
Planning Your Garage Door Installation Project
Good installations start long before anyone picks up a drill. The planning phase determines whether the rest of the project goes smoothly or turns into an expensive headache.
Assess Your Current Setup
Start by measuring your garage opening precisely. You’ll need the width, height, sideroom (the space between the opening and the nearest wall), headroom (the distance from the top of the opening to the ceiling), and backroom (the depth of the garage). Standard residential garage doors are 8 or 9 feet wide for single-car garages and 16 feet for double-car garages, but custom sizes are common in older California homes.
Check the condition of your existing frame, header, and weatherseal. Rotted wood, cracked concrete, or a settled slab can all affect the new installation and may require repairs before you proceed.
Define Your Budget and Priorities
Think about what matters most for your situation:
- Insulation: If your garage is attached to the house (especially in Sacramento’s 100°F+ summers or Bay Area’s foggy winters), insulation directly affects comfort and utility costs.
- Durability: Coastal homes need corrosion-resistant materials. High-traffic commercial properties need heavy-duty components.
- Curb appeal: The garage door accounts for up to 30% of your home’s front-facing exterior. Style choices matter.
- Security: Modern doors with reinforced panels, tamper-resistant brackets, and smart openers provide better protection.
Check Local Building Codes
California has specific requirements that affect garage door installations. Since 2019, SB 969 requires battery-backup openers on all new or replacement installations. Wind-load ratings may apply in certain coastal and canyon areas. If your property is in a Wildland-Urban Interface (WUI) zone, fire-rated doors may be required. Always confirm code requirements with your local building department or with your installation professional before purchasing materials.
Choosing the Right Door Material
The material you choose affects everything: appearance, insulation, maintenance, weight, and price. Here’s how the most common garage door options compare for California homeowners.
Steel Garage Doors
Steel garage doors are the most popular choice for good reason. They’re durable, low-maintenance, and available in dozens of panel styles and colors. Modern steel doors come in single-layer, double-layer (with insulation backing), and triple-layer (steel-insulation-steel) configurations.
- Best for: Most residential and commercial properties
- Insulation options: R-6 to R-18+
- Maintenance: Minimal. Occasional washing and touch-up paint.
- Watch out for: Lower-gauge (thinner) steel dents easily. Coastal homes need galvanized or painted finishes to prevent rust.
Wood Garage Doors
Wood garage doors offer unmatched natural beauty and are ideal for Craftsman, farmhouse, and traditional California home styles. Cedar, redwood, and hemlock are popular species that hold up well in mild climates.
- Best for: Custom homes, historic properties, and homeowners who prioritize aesthetics
- Insulation: Wood provides natural insulation, enhanced further with composite overlays
- Maintenance: Higher. Requires staining or painting every 2 to 3 years to prevent moisture damage, warping, and UV degradation.
- Watch out for: Wood doors are heavier than steel, which means heavier springs and more strain on the opener. Proper balance is critical.
Aluminum and Glass
Modern aluminum-and-glass doors are lightweight, rust-resistant, and let natural light into the garage. They’re popular in contemporary home designs across the Bay Area and Southern California.
- Best for: Modern homes, studio garages, and properties prioritizing natural light
- Watch out for: Glass panels can reduce insulation values. Tempered or frosted glass provides better privacy and durability.
💡 Pro Tip: Match Your Climate
Coastal California homes (San Francisco, Monterey, Santa Cruz) should prioritize corrosion resistance. Inland homes (Sacramento, Fresno, Stockton) need higher insulation values. Consult with a local expert at GoPro Garage Doors to match your material to your specific conditions.
Tools and Equipment You’ll Need
Whether you’re assisting a professional or exploring what the project entails, understanding the tools required gives you a realistic picture of the complexity involved.
Essential Tools
- Power drill with socket and bit attachments
- 4-foot level and a plumb bob
- Tape measure (25-foot minimum)
- Socket wrench set (including deep sockets for lag bolts)
- Vice grips and adjustable pliers
- Rubber mallet
- Stepladder (6-foot or taller)
- C-clamps for securing panels during assembly
- Winding bars (for torsion spring adjustment, professional use only)
Materials and Components
- Garage door panels (complete set with hardware kit)
- Track system (vertical and horizontal sections)
- Torsion or extension springs (matched to door weight)
- Cables, drums, and bearings
- Hinges, rollers, and brackets
- Bottom weatherseal and side weatherstripping
- Lag bolts, screws, and angle brackets
- Garage door opener with mounting hardware (if installing new)
One critical detail: all springs, cables, and tension-bearing components must be rated for your specific door’s weight. Using mismatched parts is one of the most dangerous mistakes in garage door installation.
Safety Essentials Before You Start
This isn’t an area where you can afford to learn by trial and error. Garage door installation involves heavy panels, high-tension components, and moving parts that can cause serious injury in seconds.
Non-Negotiable Safety Rules
- Never attempt spring work alone. Torsion springs store enough energy to cause fatal injuries. This is the single most dangerous part of any garage door installation, and it’s the primary reason professionals exist.
- Wear protective gear at all times. Safety glasses, heavy-duty gloves, steel-toed boots, and long sleeves protect against metal edges, flying debris, and pinch points.
- Work with a partner. Garage door panels can weigh 50 to 100 pounds each. Lifting, aligning, and fastening panels requires at least two people.
- Disconnect power to the opener before working near wiring, sensors, or the motor unit.
- Use C-clamps on the track to lock panels in place while working. This prevents the door from sliding or falling unexpectedly.
- Keep children and pets away from the work area entirely. No exceptions.
Choose the Right Weather Conditions
Plan your installation for a mild, dry day. Rain makes concrete and metal surfaces slippery. Extreme heat (common in Central Valley summers) causes metal to expand and can throw off measurements. Strong winds, like Santa Ana gusts in Southern California, can catch door panels and create a dangerous sail effect.
Ideal conditions: 55°F to 80°F, no wind, no rain, with plenty of natural light.
Step-by-Step Garage Door Installation Process
Here’s an overview of what a complete garage door installation involves. This process applies to standard sectional garage doors, which account for the vast majority of residential installations.
Step 1: Remove the Old Door (If Replacing)
Before anything new goes in, the old door has to come out safely. This means releasing spring tension first (which should only be done by a trained technician), disconnecting the opener, removing panels from top to bottom, and pulling out the old track system. Inspect the framing for damage and make any needed repairs before proceeding.
Step 2: Prepare the Opening
Clean the entire area thoroughly. Remove debris, nails, and old hardware. Verify that the opening is level and plumb. Even a half-inch deviation can cause binding, uneven wear, and premature failure. If your garage slab has settled or cracked, address it now. A door installed on an uneven surface will never operate correctly.
Step 3: Install the Bottom Panel First
Set the bottom panel into position inside the opening. Level it carefully and secure it with C-clamps. Attach the bottom weatherseal. This panel becomes the foundation for everything above it, so precision matters here more than at any other step.
Step 4: Stack and Secure Remaining Panels
Working from bottom to top, add each panel section. Insert hinges between panel joints and install rollers into the hinge brackets. Check alignment after every panel. If something looks off, stop and correct it before adding more weight.
Step 5: Install the Track System
Attach vertical track sections to the door jambs. Install horizontal tracks along the ceiling, making sure they pitch slightly toward the back of the garage (most manufacturers specify a 1-inch drop per 10 feet). Secure all brackets to the header and ceiling supports with lag bolts, not drywall screws. If your tracks are misaligned, the door will bind, jump, or scrape.
Step 6: Install Springs, Cables, and Drums
This step is for trained professionals only. Torsion springs mount on a steel shaft above the door opening. They must be wound to exact specifications based on the door’s weight, height, and track radius. Extension springs (used on some lighter doors) run along the horizontal tracks and also operate under dangerous tension.
Getting this wrong doesn’t just damage the door. It creates a life-threatening hazard. If you’re doing any part of this installation yourself, this is where you stop and call a spring specialist.
Step 7: Balance and Test the Door
After spring installation, disconnect the opener and test the door manually. Lift it halfway and let go. A properly balanced door should stay in place, not drift up or slam down. If it moves more than an inch or two in either direction, the spring tension needs adjustment.
Step 8: Seal the Edges
Apply weatherstripping to the bottom, sides, and top of the door. This prevents drafts, water infiltration, dust, and pests from entering the garage. In California, proper sealing also helps meet Title 24 energy efficiency requirements for attached garages.
Garage Door Opener Installation
Once the door itself is properly installed and balanced, the next step is mounting the garage door opener. This is the motorized unit that automates opening and closing.
Types of Garage Door Openers
- Belt drive: Quietest option. Ideal for attached garages where bedrooms are above or adjacent. Uses a rubber belt instead of a metal chain.
- Chain drive: Most affordable and reliable. Slightly louder but excellent for detached garages and commercial applications.
- Screw drive: Fewer moving parts means less maintenance. Good for one-piece doors and moderate climates.
- Direct drive (wall-mount): The motor itself moves along a stationary chain. Extremely quiet, frees up ceiling space, and works well with high-lift track systems.
Key Opener Features to Consider
- Battery backup: Required by California law (SB 969) on all new and replacement installs since 2019.
- Wi-Fi connectivity: Real-time alerts, remote control from your phone, activity logs, and scheduled close functionality.
- Photo-eye sensors: Mandatory safety feature that prevents the door from closing on a person, pet, or object.
- Horsepower rating: ½ HP handles most single-car doors. ¾ HP or 1 HP is better for double-car, insulated, or heavy wood doors.
If your existing opener is more than 10 to 15 years old, it likely lacks battery backup and modern safety features. A new door installation is the perfect time to upgrade. Our motor repair and installation team can help you choose the right opener for your door and garage configuration.
Common Garage Door Installation Mistakes to Avoid
Even experienced DIYers make these errors. Each one can lead to safety hazards, operational problems, or premature failure.
- Skipping the balance test. An unbalanced door strains the opener, accelerates spring wear, and can cause the door to slam shut without warning.
- Using incorrect spring sizes. Springs must match the exact weight and height of the door. Overloaded springs fail prematurely; underloaded springs leave the door too heavy for safe manual operation.
- Ignoring track alignment. Even slight misalignment causes rollers to wear unevenly, creating noise, binding, and eventual derailment.
- Using inadequate fasteners. Lag bolts rated for the structural load are essential. Drywall screws or undersized bolts will pull out under the door’s weight and vibration.
- Forgetting weatherstripping. Gaps invite moisture, pests, drafts, and energy loss. In California’s fire zones, gaps also allow ember intrusion.
- Not reading the manufacturer’s instructions. Every door model has specific requirements for hardware placement, spring specifications, and opener compatibility. Follow them exactly.
- DIY spring winding. This bears repeating. Torsion spring winding without proper tools and training is the number one cause of serious garage door installation injuries.
DIY vs. Professional Garage Door Installation
Let’s be honest about what you can realistically handle yourself and what truly requires a pro.
| Task | DIY Feasible? | Risk Level |
|---|---|---|
| Measuring the opening | Yes | Low |
| Removing old weatherstripping | Yes | Low |
| Preparing and cleaning the opening | Yes | Low |
| Assembling and stacking panels | With a partner | Medium |
| Installing and aligning tracks | Advanced DIY only | Medium |
| Installing the opener motor | With experience | Medium |
| Spring installation and tensioning | No. Professional only. | High (life-threatening) |
| Cable installation and adjustment | No. Professional only. | High |
| Final balancing and safety testing | No. Professional only. | High |
When to Call GoPro Garage Doors
The straightforward answer: if your project involves springs, cables, track alignment, or any component under tension, you need a trained technician. GoPro Garage Doors has been serving Northern California since 1979, and our certified installers handle everything from single-car residential garage doors to full-scale commercial door systems.
We offer same-day or next-day service, free estimates, and competitive pricing. Our technicians arrive with the parts and tools needed to complete the job in a single visit, minimizing disruption to your schedule.
🔧 Thinking About a New Installation?
Every installation includes a thorough consultation, precise measurements, professional mounting and balancing, full safety testing, and a walkthrough of your new system. We handle residential and commercial garage door installations across Northern California. Call (888) 987-0933 for a free estimate.
Post-Installation Checklist and Ongoing Maintenance
Once your new garage door is installed, a few final checks ensure everything is safe and performing at its best.
Immediate Post-Installation Checks
- Cycle the door 5 to 10 times using the opener. Watch for smooth, even travel in both directions.
- Test the auto-reverse feature. Place a 2×4 board flat on the ground under the door. Close the door. It must stop and reverse upon contact. This is a mandatory safety feature.
- Check photo-eye sensors. Both LEDs should be solid (not blinking). Walk through the beam while the door is closing to confirm it reverses.
- Inspect all hardware. Confirm that every bolt, bracket, and hinge is tight. Check that the track is plumb and level.
- Verify weatherseal contact. The bottom seal should contact the floor evenly across the entire width, with no visible gaps.
- Test manual release. Pull the red emergency cord and operate the door manually. It should lift and stay open at the halfway point.
Ongoing Maintenance Schedule
A new garage door doesn’t mean maintenance-free. Regular care keeps everything running right and catches problems before they become expensive. Enrolling in a garage door maintenance program takes the guesswork out of upkeep.
- Monthly: Visual inspection of springs, cables, rollers, and tracks. Listen for new noises.
- Every 3 months: Lubricate rollers, hinges, and springs with silicone-based or lithium-based garage door lubricant (never WD-40).
- Every 6 months: Test the balance, auto-reverse, and photo-eye safety features. Check weatherstripping condition.
- Annually: Schedule a professional garage door maintenance inspection covering tension calibration, hardware tightening, sensor alignment, and overall system health.
For California homes in coastal, high-heat, or fire-prone areas, twice-yearly professional service is highly recommended. Salt air corrodes hardware faster. Heat cycling weakens springs. Wildfire ash clogs sensors and tracks.
Frequently Asked Questions About Garage Door Installation
How much does garage door installation cost?
Costs vary based on door material, size, insulation, and opener type. A basic single-car steel door installation typically ranges from $750 to $1,500, while a double-car insulated or wood door can run $1,500 to $4,000 or more. Custom doors, high-end openers, removal of old doors, and structural repairs add to the total. GoPro Garage Doors offers free estimates so you’ll know the exact cost upfront before any work begins.
How long does it take to install a new garage door?
A standard residential garage door installation takes 3 to 6 hours for an experienced technician. Complex installations involving custom doors, structural modifications, or new opener systems can take a full day. DIY installations often stretch across an entire weekend and carry significant safety risks, particularly with spring tensioning and track alignment.
Can I install a garage door myself, or should I hire a professional?
While some preparation tasks are DIY-friendly (measuring, cleaning the opening, removing old weatherstripping), the actual installation should be handled by a professional. Garage door springs operate under extreme tension and cause roughly 30,000 emergency room visits each year. Incorrect installation can void manufacturer warranties, fail building code inspections, and create serious safety hazards. Professional installers have the specialized tools, training, and insurance to complete the job safely and correctly.
How often should a garage door be serviced after installation?
A garage door should be professionally serviced at least once per year. In harsh California climates like coastal salt air, extreme inland heat, or high-cycle households with electric vehicles, twice-yearly maintenance is ideal. Regular servicing includes lubricating moving parts, checking spring tension, testing safety features, tightening hardware, and inspecting weatherstripping. Consistent maintenance extends your door’s lifespan by several years and prevents unexpected breakdowns.
Ready for a Professional Garage Door Installation?
Whether you’re installing your first garage door, replacing an aging system, or upgrading to a modern insulated door with smart opener technology, GoPro Garage Doors is here to help. With 40+ years of experience, certified technicians, and same-day service across Northern California, we make the process easy, safe, and affordable.
- Free on-site estimates with no obligation
- Same-day or next-day emergency service available
- Licensed, insured, and bonded (California CSLB)
- Competitive pricing with military and senior discounts
- Wide selection of steel, wood, and custom doors
- Expert repair and replacement services